前回は、Angular8とBootstrap4を使って、ポートフォリオサイトの雛形を作りました。
今回は、以下を実装します。
- Firebaseを使ったGoogleアカウント認証機能
- 認証したアカウント情報の一部をFireStoreに格納する
- 認証したユーザー情報を表示するプロフィールページ
環境
以下の通りです。
- OS: Ubuntu 18.04
- Angular: 8.2.14
- Angular CLI: 8.3.19
- Node.js: 12.13.0
- firebase@7.5.0
- @angular/fire@5.2.3
手順
大まかな流れとしては、以下の通りです。
- Firebaseでプロジェクト作成
- AngularからFirebaseを操作するAngularFireをセットアップ
- トップページにGoogleアカウント認証機能を実装
- プロフィールページを実装
それでは始めましょう。
Firebaseでプロジェクト作成
Firebaseのサイトにアクセスします。
Googleアカウントが必要なので、持っていない場合は新規に取得しましょう。
案内に従ってプロジェクトを作成したら、以下の部分をメモしておきます。
Project Overview > プロジェクトの設定 「全般タブ」のプロジェクトIDと、ウェブAPIキー
「クラウド メッセージング」タブの送信者ID
確認し終わったら、実際に、AunglarJSアプリケーションに、Googleアカウントログイン機能を実装していきます。
AngularFireのセットアップ
AngularFireとFirebaseをインストール
$ npm install @angular/fire firebase --save
プロジェクトのパラメーターファイルにFirebaseの設定を追記
「Firebaseのセットアップ」で確認した値を使います。
$ vi src/environments/environment.ts
export const environment = {
  production: false,
  firebase: {
    apiKey: '<ウェブAPIキー>',
    authDomain: "<プロジェクトID>.firebaseapp.com",
    databaseURL: "https://<プロジェクトID>.firebaseio.com",
    projectId: "<プロジェクトID>",
    storageBucket: "<プロジェクトID>.appspot.com",
    messagingSenderId: "<送信者ID>",
  }
};
Googleアカウント認証処理の実装
core moduleを作成
$ ng g module core
core.moduleで、AngularFirebaseモジュールを読み込む
$ vi src/app/core/core.module.ts
//...
import { AuthService } from './auth.service';
import { AngularFireAuthModule } from '@angular/fire/auth';
import { AngularFirestoreModule } from '@angular/fire/firestore';
//...

@NgModule({
  declarations: [],
  imports: [
  //...
    AngularFireAuthModule,
    AngularFirestoreModule
  //...
  ],
  providers: [AuthService]
})
export class CoreModule { }
AuthServiceは、認証に使う処理をまとめたものを後程作るので、ここでは定義のみ
次に、app.moduleに”core.module”をインポートします。
$ vi src/app/app.module.tsimport { CoreModule } from './core/core.module';
import { AngularFireModule } from '@angular/fire';
import { environment } from '../environments/environment';
// ...
@NgModule({
// ...
imports: [
BrowserModule,
AppRoutingModule,
AngularFireModule.initializeApp(environment.firebase),
CoreModule,
]
})
export class AppModule { }認証関連のサービスをAuthServiceとして作成
$ ng g service core/auth認証関連の処理を追加
$ vi src/app/core/auth.service.tsimport { Injectable } from '@angular/core';
import { Router } from '@angular/router';
import { auth } from 'firebase/app';
import { AngularFireAuth } from '@angular/fire/auth';
import { AngularFirestore, AngularFirestoreDocument } from '@angular/fire/firestore';
import { Observable, of } from 'rxjs';
import { switchMap} from 'rxjs/operators';
interface User {
uid: string;
email: string;
photoURL?: string;
displayName?: string;
favoriteColor?: string;
}
@Injectable({ providedIn: 'root' })
export class AuthService {
user: Observable<User>;
constructor(
private afAuth: AngularFireAuth,
private afs: AngularFirestore,
private router: Router
) {
//// Get auth data, then get firestore user document || null
this.user = this.afAuth.authState.pipe(
switchMap(user => {
if (user) {
return this.afs.doc<User>(`users/${user.uid}`).valueChanges()
} else {
return of(null)
}
})
)
}
googleLogin() {
const provider = new auth.GoogleAuthProvider()
return this.oAuthLogin(provider);
}
private oAuthLogin(provider) {
return this.afAuth.auth.signInWithPopup(provider)
.then((credential) => {
this.updateUserData(credential.user)
})
}
private updateUserData(user) {
// Sets user data to firestore on login
const userRef: AngularFirestoreDocument<any> = this.afs.doc(`users/${user.uid}`);
const data: User = {
uid: user.uid,
email: user.email,
displayName: user.displayName,
photoURL: user.photoURL
}
return userRef.set(data, { merge: true })
}
signOut() {
this.afAuth.auth.signOut().then(() => {
this.router.navigate(['/']);
});
}
}ユーザープロファイルページを生成
$ ng g component user-profile認証サービスをインポート
$ vi src/app/user-profile/user-profile.component.tsimport { AuthService } from '../core/auth.service';
//...
export class UserProfileComponent implements OnInit {
constructor(private auth: AuthService) { }
//...
}ユーザープロフィール画面を作成
$ vi src/app/user-profile/user-profile.component.html<div *ngIf="auth.user | async; then authenticated else guest">
<!-- template will replace this div -->
</div>
<!-- User NOT logged in -->
<ng-template #guest>
<h3>Howdy, GUEST</h3>
<p>Login to get started...</p>
<button (click)="auth.googleLogin()">
<i class="fa fa-google"></i> Connect Google
</button>
</ng-template>
<!-- User logged in -->
<ng-template #authenticated>
<div *ngIf="auth.user | async as user">
<h3>Howdy, {{ user.displayName }}</h3>
<img [src]="user.photoURL">
<p>UID: {{ user.uid }}</p>
<p>Favorite Color: {{ user?.favoriteColor }} </p>
<button (click)="auth.signOut()">Logout</button>
</div>
</ng-template>ルーターを追加
$ vi src/app/app-routing.module.tsimport { UserProfileComponent } from './user-profile/user-profile.component';
//...
const routes: Routes = [
///...
{ path: 'user/profile', component: UserProfileComponent},
];app.componentにAuthServiceをインジェクションして、ログイン/ログアウト処理を実装
$ vi src/app/app.component.tsimport { AuthService } from './core/auth.service';
//...
export class AppComponent {
//...
constructor(private authService: AuthService) { }
login() {
this.authService.googleLogin();
}
logout() {
this.authService.signOut();
}
//...
}ヘッダーナビゲーション内に、ログインボタンを配置
ログイン後は、プロファイルページへのリンクがついたユーザー名を表示します。
$ vi src/app/app.component.html<nav class="navbar navbar-expand-md navbar-dark bg-dark fixed-top">
<a class="navbar-brand" href="#">ポートフォリオ</a>
<div class="collapse navbar-collapse" id="navbarCollapse">
<!-- ここから -->
<div class="ml-auto">
<div *ngIf="authService.user | async as user; else showLogin">
<span style="color: white"> ようこそ<a routerLink="/user/profile">{{ user.displayName }}</a></span>
<button class="btn btn-primary ml-2" (click)="logout()">Logout</button>
</div>
<ng-template #showLogin>
<button class="btn btn-primary ml-2" (click)="login()">Login with Google</button>
</ng-template>
</div>
<!-- ここまで -->
</div>
</nav>
...結果
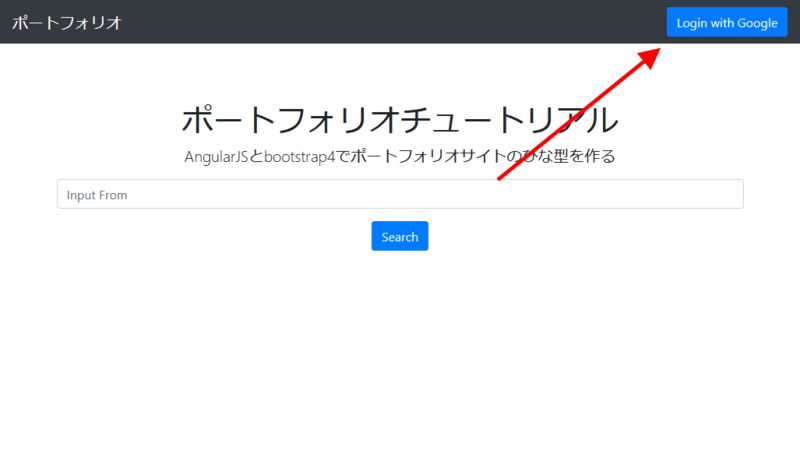
トップページを確認すると、画面右上にログインボタンが表示されています。
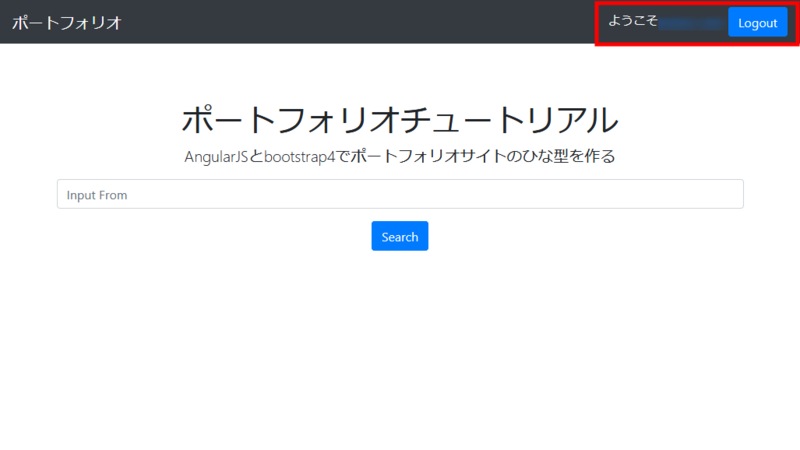
ログインすると、ボタンがログアウトボタンに変わり、隣にGoogleアカウントのユーザー名が表示されます。
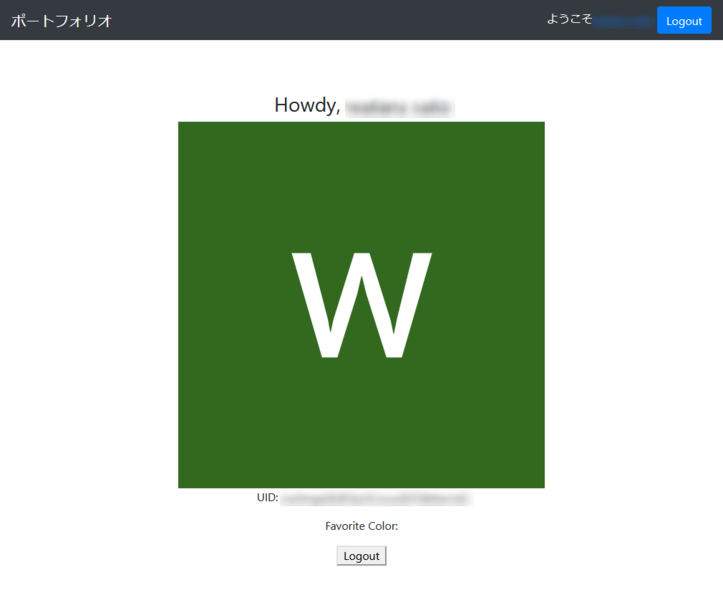
ユーザー名をクリックすると、ユーザーのプロフィールページへ遷移します。
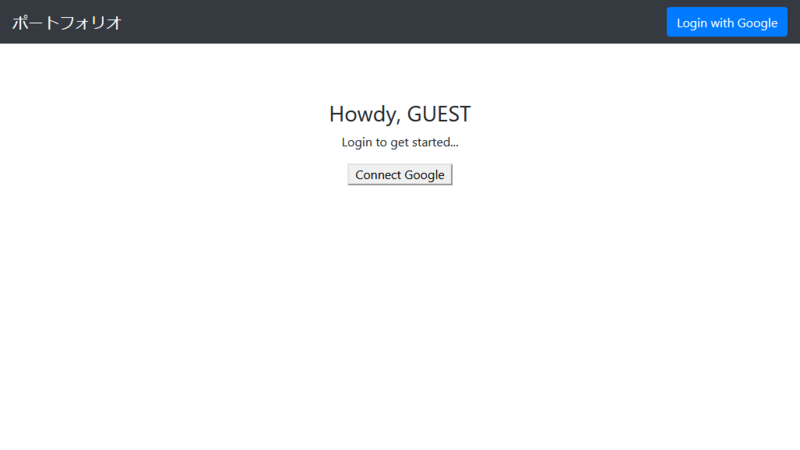
ログインしていない状態で、プロフィールページへアクセスすると、ログイン画面が表示されます。
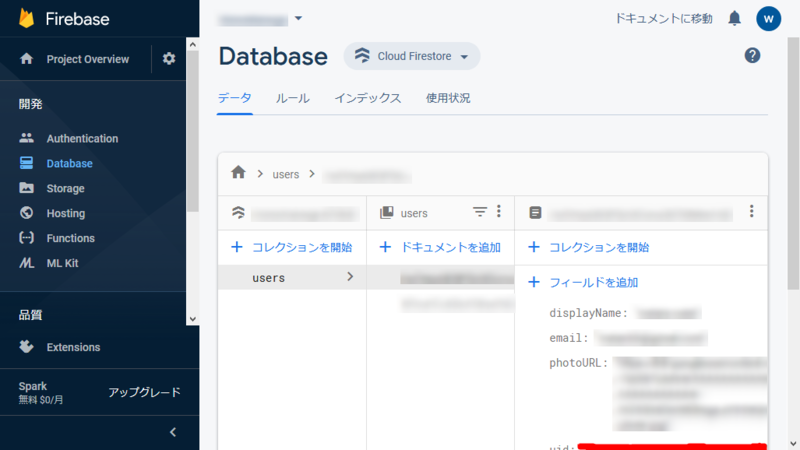
FirebaseStoreを見ると、データが登録されています。
Database > Cloud Firestore > データ
以上で実装完了です。
まとめ
今回は、AngularFirebaseを使って、ログイン認証処理と、Cloud FireStoreへデータを登録してみました。
次回は、ユーザーデータを使った実践的なアプリケーションを作りたいと思います。
参考
GitHub公式
AngularFirebase Lesson


コメント